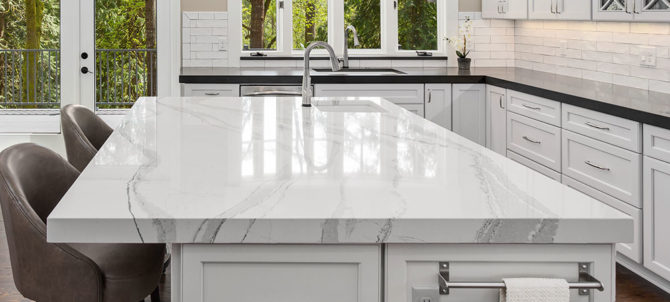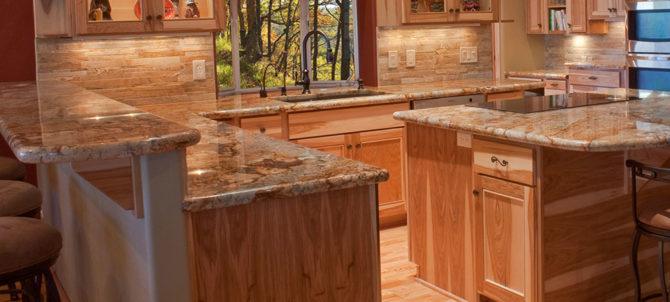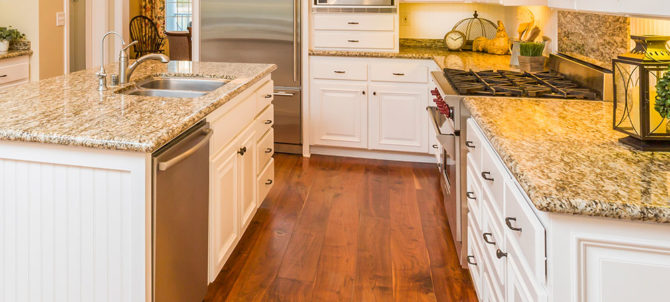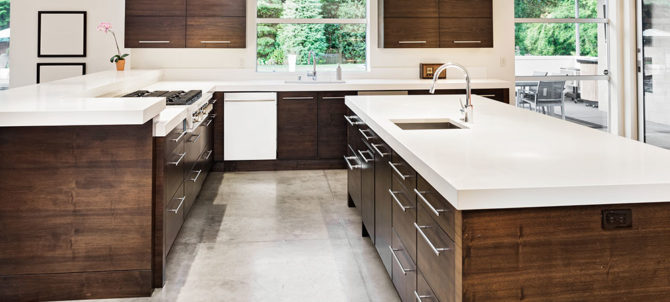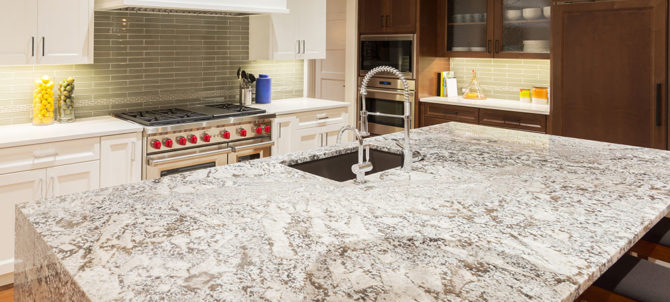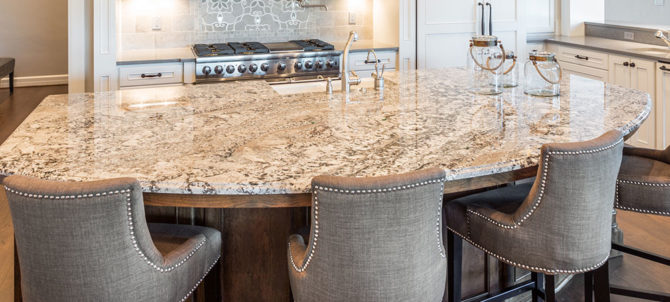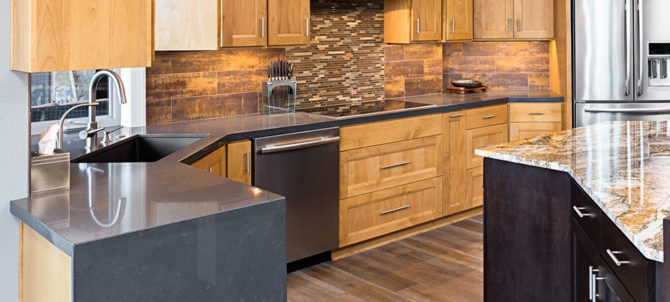
Things You Should Know When Buying Marble Countertops

Marble countertops give your home an elegant appeal. If you love baking, they are the perfect units to go for, as they give you the perfect surface to work on.

If you are looking to buy the countertops, there are a number of things you should know. These things include:

If you are worried about stains, go with white marble

Although many people associate marble with creamy, white stone, there are hundreds of varieties that you can go with which include taupe, green, gold, red, and black.

White marble is best used for kitchen surfaces. This is because there are higher risk of stains forming here than anywhere else. In the event acid etching leaves a pale mark, it is considerably more visible on colorful marble than on white marble. You don’t want everyone to notice the stains on your surfaces, do you?

You should be ultra-cautious when using dark marble or nonwhite marble for kitchen countertops, as they can easily look dirty and out of place even with minor stains.

Consider how the different slabs will come together

Every stone slab is unique, so it’s best to choose the exact pieces of stone that you will use on your countertops. There’s an art to marble and choosing the right slabs and understanding the location of the veins is critical.

You want to artfully place the markings so that it’s almost like a painting. At the same time, it’s critical to consider how various components work together.

The longer the slab you can get without any seams, the better. If you do have seams on your slabs, it’s always nice to book-match the marble, so that neighboring pieces appear mirrored.

Take veining into consideration

Every quarry is unique, however, certain types of marble blocks can be cut in two different ways to produce distinct veining patterns.

For example, cross cut, or fleuri cut, produces stone slabs that are random and are good for book-matching.

Vein cut, also known as striato, slices the block in the opposite direction to create a linear, striped appearance.

Over the years, designers have used both cuts to create some unique looks. Some use vein-cut on the wall and cross-cut on the floor.

Consider the best finish to transform your marble

The entire stone industry has been experiencing a massive wave of technology, which is transforming the product.

Now, there are more options than ever to finish stone, including various brushing and polishing procedures. You can give your countertops an orange-peel texture, which is unique and adds interest to your surfaces.

While this is the case, you should note that the most common options remain polished (glossy) or honed (matte). For homeowners concerned about acid etching, go with a honed finish.

On a polished finish, etching will make the slab dull and more visible. With an honed finish, you’re dulling an already dull finish, so it disguises it.

Before you get the finish, take time to research it and find the one that will be best suited for your surfaces. If you are confused, get the input of a professional.

Consider the edging of the countertops

Aside from its natural beauty, there’s a reason marble has always been popular for sculpture: it’s easy to manipulate with tools. When current computer numerical control milling machines are included, practically anything is feasible in terms of kitchen decorating.

There are many edge profiles to choose from. For example, there is the simple softened edge, which reduces the sharpness of a straight 90-degree corner.

Hard stones like marble are brittle, so if you hit a 90-degree corner with something hard, it will chip. With a curve, it’s highly unlikely that it’s going to chip.

You need to ensure that during installation, the contractor you hire doesn’t leave a straight edge that will hurt the people or pets walking around. It also eliminates the chances of the stone getting damaged.

Take time to know the difference between fissures and cracks

Cracks indicate that the stone has been mishandled or poorly handled. However, fissures are quite different. A fissure differs from a crack in that it’s naturally occurring in the stone and does not change the plane of the marble surface.

Your nail should be able to slide across a fissure without getting caught.

Fissures may be okay depending on the look you’re going for—for example, if you want a stone with a more rustic appearance. Fissures do not affect the stone’s integrity; rather, they are part of its character.

When you are buying the marble, you will come across plenty of slabs with fissures. As mentioned, there is nothing wrong with fissures.

The problem comes when the countertops have cracks. You should avoid countertops with cracks as they tend to be weak.

Know the origin of the marble you are looking to buy

You should be cautious of the source of the marble you are looking to buy as it determines the quality of the stone.

White stones like Calacatta and Statuario are particularly popular right now. Some marble providers would refer to their white marble with veins as Calacatta marble.

But it won’t be authentic; it’ll be white stone with veins from China or anywhere else in the world, which tends to be cheap and low quality.

True Calacatta is sourced from mountain quarries in Carrara, Italy.

The same is true for Statuario: authentic Statuario marble comes from Italy. If you’re in a showroom and the vendors are offering something like carrara marble or carrara white, it’s important checking the stone’s origin.

To be on the safe side, go for marble that comes from Italy as it tends to be high quality.

Parting shot

These are some of the things you should know when you are looking to buy marble kitchen countertops Raleigh. After buying the countertops, you should ensure that you have them perfectly installed by experts.

You also should take good care of them. As a rule of thumb, don’t place hot objects on them, as they will get damaged. Also, be cautious of the cleaning products you use. You should always stay away from acidic cleaners as they are known to damage them.

White Kitchen Countertop Options

White countertops exude refinement and significantly improve the vibe of your kitchen, making it lighter, more spacious, and inviting. If this is what you need, you need to choose the right type of countertop.

To help you out, here are the common types of white kitchen countertops that you can go for.

White marble

Marble is the most opulent option for white kitchen countertops. The countertop is inherently cold to the touch, making it ideal for bakers and individuals who live in hot areas, and it is the whitest natural stone available.

Despite being a durable surface, marble has one significant disadvantage: it is susceptible to acids. Lemon juice and vinegar can scratch the surface, while coffee and alcohol can leave persistent stains.

Because you’re purchasing marble by the slab, you must consider how differences in veining will appear when installed in your house.

Pricing is determined by the slabs’ size and the marble’s source. True Italian marbles, such as Carrara, Calacatta, and Statuario, attract premium costs because they are both beautiful and more durable.

Lower-cost marble from other countries (such as China) can be stunning but “softer” than Italian marble.

Quartz

Most quartz countertops on the market are engineered quartz, a combination of the mineral and other elements added for strength. (This is commonly referred to as Silestone or Caesarstone.)

Engineered quartz is long-lasting, stain-resistant, and typically slightly cheaper than genuine stone. Because it is a man-made blend of materials, it is available in a wider variety of colors, finishes, widths, and thicknesses than real stone slabs.

Prices vary based on the options available. If you want a counter that looks like marble, choose Silestone’s Calacatta Gold design.

Quartzite

Quartzite and quartz are significantly distinct, despite their similar-sounding names. Quartzite is a natural substance quarried and sold in slabs; it is as strong as granite and has a comparable appearance to marble.

Acidic foods and drinks, however, can etch the substance, just like with marble. The prices of the countertops vary depending on style and size.

Solid surface

Acrylic countertops can be manufactured to seem like a variety of materials, including marble and stainless steel. Corian is one of the most popular brands of solid-surface countertops.

Counters made of this material are seamless and rather sturdy, however they are prone to scratches. They are also less heat-resistant than other materials.

This calls for you to use trivets and coasters. Prices vary by brand and type. It’s up to you to buy those that are ideal for you.

Laminate

The most cost-effective option for white countertops is laminate, made by bonding sheets to plywood or particleboard. Laminate is available in a wide range of colors and patterns, including marble-like finishes like Wilsonart’s Calcutta Marble Laminate.

Laminate countertops, like solid-surface counters, should not be exposed to high temperatures. You also should keep the coasters handy at all times.

There is no right or wrong countertop material to install. It all depends on your preferences. You should research and find a material that is most ideal for you.

Things to think about when installing white kitchen countertops

When you are installing the countertops, there are several things you should think about. These things include:

Cabinets

You need to consider the type of cabinets you will install to give your countertops and kitchen the elegant look they deserve.

If you are confused about the right choice to go with, you can’t go wrong with white cabinets.

The combination of white cabinets and white counters produces a timeless, classy appearance. This combination creates a sense of serenity and order, making your kitchen appear larger, brighter, and more welcoming.

Monochrome white kitchens are a perennial popularity with designers and homeowners alike. The consistent color palette provides a sense of continuity, resulting in a smooth transition between the different kitchen areas.

While the white-on-white kitchen design is great, it necessitates meticulous planning. To avoid your kitchen appearing flat or sterile, explore the various textures and finishes. It’s also wise to consult a professional to help you out.

Stains

Despite their beautiful appearance, white countertops have one major drawback. They tend to be less durable. For example, while beautiful, marble countertops are not the most durable option. It is prone to staining, particularly from acidic liquids such as lemon juice or alcohol.

To avoid stains, make it a habit to clean spills immediately after they happen. This is especially vital when the spills happen on porous surfaces such as marble. To clean, use a soft cloth or sponge and a light soap. Avoid aggressive cleaners, which might harm the surface.

Regularly sealing the countertops can also help avoid stains. Sealants form a protective barrier that keeps liquids from seeping into the substance.

For harder stains, use a paste of baking soda and water. Apply the paste to the stain, wait a few minutes, and gently wipe it off.

Due to this, you need to be ultra-cautious and ensure that you don’t cause any harm to your surfaces.

To extend the life of the countertops, you need to give them a lot of care. You also need to seal them regularly to protect them from staining.

Backsplash

Many homeowners underestimate the value of a well-planned backsplash and kitchen tile decision. If you are installing white countertops for the first time, you should note that these details may make or break the overall look of your kitchen with white countertops.

A backsplash is not only practical, shielding your walls from spills and splatters; it is also an important design feature. The backsplash in a kitchen with white counters can provide color, texture, and intrigue.

It’s critical to select a backsplash that matches your white worktops. You can go for a subtle, neutral color like beige tiles or a bright, contrasting hue.

Consider the material and pattern of your backsplash tiles. They should match your countertops and other kitchen pieces to create a unified effect.

When selecting tiles for white countertops, keep the entire kitchen design and your preferences in mind. You could match the white tile to the white marble countertops NC for a smooth, homogeneous look, or go with a contrasting color for a more vibrant kitchen design. It’s all up to you.

Tips to Consider When Sealing Granite Countertops

If you have a beautiful granite countertop in your kitchen and want to preserve it in good condition, you might need to seal it.

Some countertops are pre-sealed, but if yours was not (or you’re not sure if it was), don’t wait to give it the necessary protection.

Improper cleaning, overlooked spills, and other consequences of daily use can easily damage the countertops. Thankfully, a quality sealer will soak into the granite countertops, filling the porous crevices and preventing damage.

When you are sealing the countertops, you need to consider a number of valuable tips. These tips include:

Use the right sealant

You can use two main types of sealants for your countertops: water and solvent-based.

Water-based countertop sealants are environmentally benign, but solvent-based sealants may be a little better at permeating the stone.

When looking for the best granite sealer, read the labels of both water- and solvent-based sealants and look for the active ingredient fluorocarbon aliphatic resin.

Though the sealer will be more expensive than those containing siloxane and silicon, it will provide better protection. Usually, 5 to 10 years of protection, compared to 6 months to 3 years for other sealants.

Furthermore, fluorocarbon aliphatic resins reject oil and water, ensuring your granite is unaffected by a salad dressing spill.

A quart of fluorocarbon aliphatic resin sealant covers 100 to 250 square feet, depending on the brand. You may need to reapply a 24-ounce spray container of a less potent solvent every six months.

Test the countertops before applying the sealer.

You shouldn’t start sealing the countertops simply because you feel you should seal them. Instead, you should determine whether they are ready for sealing. This calls for you to test the surfaces.

The cool thing is that there are plenty of ways to test the surfaces.

You should consider sealing the countertops when they fail the water test. To test if the countertops are ready for sealing, apply a few drops of water and oil separately to two ordinarily out-of-sight locations on the countertop. If the counter discolors in any location, it is time to reseal.

You also should consider sealing the countertops if they are stained. You should look for new stains on the granite. Granite stains are distinguished by the discolored forms they leave behind; these are often black but can occasionally take on the color of whatever generated the stain (e.g., red from wine, orange from rust, etc.).

While this is the case, a lighter or rough-textured mark indicates etching caused by a chemical reaction rather than absorption.

Seal clean countertops

There is no way your dirty countertops will absorb the sealant, so you need to clean them first before applying the sealant.

A good way to go about it is to clean a granite countertop 24 hours before sealing it. When doing the cleaning, avoid vinegar, lemon juice, baking soda, bleach, and aggressive commercial cleaners, as all of these can damage your surfaces.

Start with removing everything from the counter and wipe it down thoroughly with a clean, dry microfiber towel to eliminate any surface dust.

Next, combine 1 teaspoon of dishwasher detergent and 2 teaspoons of isopropyl alcohol. Spray the countertop liberally and wipe it down with a microfiber cloth, buffing it in a circular motion.

Wait 24 hours before continuing. The cleaning agent occupies the same region that the granite sealant will penetrate, so be sure the cleaning liquid has completely evaporated before applying the sealant.

Apply the sealant on a small area.

Before you spread the sealant onto the entire countertop, first apply it on a small area.

Put on rubber gloves and gather some soft rags or washcloths. Test the sealant in an area typically occupied by a small kitchen appliance to verify it will not damage the finish.

Spray or pour a tiny amount onto a cloth following the manufacturer’s instructions, then rub it evenly over the test area.

Allow the specified time for the sealer to permeate into the granite. Allow it to sit for no longer than the manufacturer’s recommended time, as the stone may discolor.

If the sealant test area appears good, go ahead and apply the sealant to the rest of the countertop. If the countertop has discolored, remove any residual sealant with a clean rag.

Snap a few images of the area and present them to an associate at your local home center for guidance on a more suited product. Once you have a new sealant, clean the counter again and test it in an inconspicuous area.

Properly apply the sealant.

If the sealant passes the test, you should go ahead and apply it on your surfaces. Start doing the application at one end and make your way to the other.

Apply the sealant in circular areas (approximately an arm’s length in diameter) to achieve even covering. Allow the manufacturer’s specified time for the substance to absorb into the countertop.

After the absorption period, remove any excess sealant using a clean, dry rag. Some products require a second coat; therefore, follow the instructions to do so.

If the product takes only one coat, leave it to cure for 2 to 48 hours.

While this is the case, granite specialists recommend waiting at least 48 hours before wiping a newly sealed granite countertop with anything moist. Avoid returning cookware to the counter until the curing process is complete.

Parting shot

These are some of the tips you should consider when sealing your countertops. Remember that the countertops might need resealing after some time.

Before you do the resealing, always do a test to confirm that the surfaces are ripe for it.

Obviously, you shouldn’t proceed with the sealing if the surfaces aren’t ready for it.

You can always do the sealing by yourself, but if you have never done it before or aren’t confident in your skills, let experienced granite contractors Raleigh help you.

For peace of mind that the contractors you hire are experienced and know what they are doing, always do background checks on them. As a rule of thumb, read the reviews or hear what the past clients have to say.

Guide to Removing Stains From Your Kitchen Countertops

Countertops are not only utilitarian but also serve as the kitchen’s piece de resistance. Keeping them clean and bright is not only necessary for hygiene, but also to maintain the aesthetic value of your kitchen.

Due to their regular use, they tend to develop stains that are unsightly and give your kitchen a cheap, ugly look.

To keep your kitchen and countertops looking great, you need to remove the stains. How do you do it? Here is a guide on how to go about it:

Quartz countertops

Because of the nonporous nature, quartz countertops are relatively easy to keep stain-free. They are also scratch-resistant, making them suitable for a wide range of applications.

As time passes, stains on your quartz countertops may develop and become difficult to remove. Don’t panic if you have a big stain on your quartz kitchen countertop.

When you know what to do, eliminating it isn’t that tough. There are a few simple methods you can follow to remove even the most tenacious stains from your quartz surfaces.

You should start with blotting the stain. After this, mix a mild detergent (such as shampoo or dish soap) with warm water. Don’t use heavier detergents as they can damage the surface.

You should then dip a soft cloth in the mixture and apply it to the stain. Gently wipe the cloth over the stain in a circular motion for several minutes before rinsing it with warm water.

If the harsher stains remain on your countertop, you may need to repeat the technique several times.

If you have a difficult stain on your quartz countertop that won’t come out with mild detergent, try baking soda.

Making a paste of baking soda and water is an effective approach to remove persistent stains off quartz surfaces. Simply combine a few tablespoons of baking soda and equal parts water to make a paste.

You should then apply it to the stain and allow it to settle for a few minutes. After this, wipe it off with a gentle towel.

If you have tougher stains that baking soda won’t remove, use poultice as is a stronger, easier, and safer approach. To produce a poultice, use baking soda and hydrogen peroxide.

Apply the paste to the stain with a moist cloth and then wrap it in plastic. Allow the poultice to stay for a few hours before wiping it clean with a moist cloth.

Baking soda and hydrogen peroxide work together to remove the stain from the quartz countertop, allowing you to restore its natural brilliance. With a little effort, you can remove even the most stubborn stains from your quartz countertops.

Marble countertops

Marble is among the most porous natural stone materials available. With that in mind, any spills on the stone can easily get to the inner layers. To avoid this, you must clean them up quickly and within the shortest time possible.

If you leave the spills on the surface, your marble may be permanently damaged and you don’t want this, do you?

If removing the spill does not work and you wind up with a stain, don’t worry. You can remove most of the marble stains with poultice. A poultice will pull the discoloration from your marble and leave it clean and attractive.

Don’t worry if the poultice doesn’t work the first time. Reapply it and wait. If it still does not remove the stain, contact an expert to determine the best course of action.

The last thing you want to do when attempting to remove a stain from your marble is cause additional damage to it.

To avoid this, never attempt to remove a stain with bleach or other aggressive cleansers. Harsh cleaners include any acidic materials. Using these cleaners can wear down the marble’s surface and you don’t want this.

While marble is one of the most porous materials available, there is one important step you can take to reduce the likelihood of stains: sealing.

Sealing your marble countertop or other surfaces will stop the pores, preventing liquids and stains from passing through. Keep in mind that this seal won’t last forever. You will need to re-seal your countertops every several months.

Sealing the countertops is easy. Start by clearing and cleaning the surface. Next, apply the sealant. Depending on the product, you may need to apply the sealer with a brush or a spray bottle.

Apply the sealant to the marble and ensure that you cover the entire surface. After that, wait 15 minutes to observe the sealer.

If all of the sealer has been absorbed within 15 minutes, apply another coat. After you’ve finished waiting, wipe off any excess sealant and let your marble surface sit for 24 hours.

You can do the sealing by yourself but for the best outcome, let a professional help you out.

Concrete Countertops

Like marble, concrete countertops are highly porous. Due to this, applying a sealant to make the surface more resistant to stains and scratches is an important step toward preventing damage.

If you have stains on your concrete countertop, all is not lost. The staining could be the result of a poorly performing sealer failing to protect the concrete, temporary surface stains on a coating sealer, or staining agents getting into scratches on a high-performance coating sealer.

Before you start working on stains, first evaluate the situation.

Does the sealer appear to be unharmed, implying that this is most likely a surface stain on the sealer? 

If it does not, the sealer is most likely still intact, and you will only need to bleach out the surface stains.

Does the sealant appear to be destroyed, and the stain is in the concrete? Is the concrete simply discolored, or has it been etched away by an acidic substance (rough or pitted)? If the former, you can use bleach to remove the discoloration.

If the latter, you will need to repair the concrete before resealing, unless you want a rough patch to stay on your countertop.

Has oil penetrated through a scratch and blackened the concrete kitchen countertops Raleigh? You will need to apply a poultice to remove the oil.

Your Guide to White Kitchen Countertops

Have you always wanted white kitchen countertops? There are many options you can go with. They include:

White marble

Marble is the most expensive option for white kitchen countertops. This material has the advantage of being naturally cold to the touch (ideal for bakers and those who live in hot areas) and being the whitest natural stone available.

Despite being a hard surface, marble has one notable disadvantage: it is acid-resistant. Lemon juice and vinegar can scratch the surface, while coffee and wine can stain it permanently.

Because you are purchasing marble by the slab, you must consider how differences in veining will appear when installed. When buying the slab for the first time, it’s always wise to get in touch with a professional who will guide you on the right slab veining to go with.

When making the purchase, you should note that the price of the countertops varies based on the slabs’ size and the marble’s source.

This means that authentic Italian marbles such as Carrara, Calacatta, and Statuario attract high costs because they are both beautiful and durable. Lower-cost marble from other countries (such as China) can be beautiful, although it is “softer” than Italian types.

You can easily buy a cheap slab without knowing, making it another reason to always involve experienced contractors in your purchase.

Quartz

The majority of quartz countertops on the market are engineered quartz, which is a mineral blend with other materials added for strength. (This is frequently seen under the brand names Silestone and Caesarstone.)

Engineered quartz is more durable, stain-resistant, and often less expensive than genuine stone. Because it is a man-made material blend, it is available in a wider selection of colors, finishes, widths, and thicknesses than real stone slabs.

Silestone is cheaper than marble per square foot, and the prices vary depending on the options available in the market. If you want a marble-like counter, choose Silestone’s Calacatta Gold design.

Quartzite

Though they sound similar, quartzite is not the same as quartz. Quartzite is a quarried natural stone that comes in slabs; it is as strong as granite and has a comparable appearance to marble.

If you consider installing it, note that acidic foods and beverages, like marble, can etch the material. The beauty of it is that it’s cheaper than marble and quartz, and the prices vary depending on style and size.

Solid surface counters

These countertops are constructed of acrylic and can be designed to seem like anything from marble to stainless steel.

Corian is one of the most popular solid-surface countertop brands. Counters made of this material are seamless and rather sturdy; however, they are easily scratched.

They are also not as resistant to heat as other materials. However, the solution is quite simple: Use trivets and coasters instead.

Laminate

Laminate, made by bonding sheets to plywood or particleboard, is the most cost-effective option for white countertops. So, if you are operating on a budget, these are the best units to go for.

Laminate is available in almost every color or pattern, including marble lookalikes. Laminate, like solid-surface counters, should not be exposed to heat. Keep those coasters close to reach at all times.

Tips to keep your white countertops in top shape

For you to retain your white countertops looking great, you should take good care of them. Some of the things you should do include:

Clean them regularly

There is no way your countertops will look great if you don’t clean them regularly. Thankfully, it’s easy to keep them in good shape.

For the best experience, ensure that you use the right cleaning products. To do the cleaning, you need a soft cloth or sponge. Avoid using abrasive items that could scratch the surface.

You also need a basic combination of dish soap and warm water. This is usually sufficient for cleaning daily spills and messes.

Follow these routine cleaning steps to keep your countertops looking clean and appealing:

Clean your countertops daily by wiping them down with a soft cloth or sponge dampened with warm, soapy water.

Remove spills as soon as possible: The longer a spill lingers, the more likely it may stain. You should clean the spills immediately to avoid stains and potential damage.

Keep an eye out for stains.

As much as white countertops look great, they are prone to staining. To get rid of the stains, use a nonabrasive sponge or cloth: Scrub the soiled area gently with a moist sponge or cloth dipped in mild soap.

For harsher stains, mix equal parts water and white vinegar to make a solution, then apply it to the stain, let it soak for a few minutes, and then wash it away.

To prevent stains from coming about, use trivets for hot cookware and coasters for drinks.

You should make it a habit to clean spills as soon as possible. This way, you prevent them from settling for a long time, increasing the chances of developing stains.

Keep your surfaces residue-free

Follow these guidelines to keep your countertop residue-free:

Clean the cooking areas regularly. For the best outcome, wipe off the countertops surrounding cooking zones daily.

Avoid using strong chemicals or rough instruments: To avoid countertop damage, use mild cleaning procedures.

If you have ignored your countertops and now they have developed residues, consider the following steps when dealing with dried residue or grease:

Scrape the surface using a plastic scraper or spatula: Remove the residue using a nonabrasive tool, being careful not to scratch the countertop’s surface.

Use a glass cleaner or degreasing solution: Spray a glass cleaner or degreasing solution on the residue, let it sit for a few minutes, and then wipe it away with a soft cloth.

Parting shot

These are some of the options you have when you are looking to install white countertops. Regardless of whether you go with granite or marble countertops NC, you need to take good care of them to look good and last for a long time.

Can You Pour Boiling Water On Quartz Countertops?

Thinking of adding quartz countertops to your space? Great move because these countertops have been capturing the attention of many not only for their visual appeal but also for their resistance to staining and durability. As a homeowner, you will also appreciate that they are low-maintenance as well.

Now, because quartz countertops are mostly installed in kitchens and bathrooms, you may be wondering if yours coming into contact with hot water may be a problem. Well, that depends on how often that happens and for how long the water sits on the surface.

In this article, we will explore the composition of quartz countertops, their heat resistance, and debunk common myths surrounding their invincibility.

Understanding quartz countertops

To understand the effect of hot water on your quartz countertop, you need to understand its composition first. They are usually made from stone, comprising a huge percentage of crushed quartz crystals mixed with polymers, resins, and pigment.

When all these are mixed, the result is a beautiful, non-porous material that you call a quartz surface.

What is the heat resistance of quartz?

Surely, even with its impressive heat-resistant abilities, quartz has to have a certain temperature degree that will make it crack.

True to this, the material can only handle temperatures of 150 degrees Celsius before showing signs of damage. This high tolerance can be attributed to the resin contained in quartz.

The myth of invincibility

Most people misconstrue quartz to be indestructible, which is also why most people choose it for their kitchens and bathrooms. You should note that quartz has a breaking point where it cannot withstand stress. Exposure to extremely high temperatures may cause it to falter.

 As such, it is important to understand the potential risks as well as employ the necessary measures to ensure that your quartz countertop maintains its beauty and durability.

The reality of thermal shock

Now, while your quartz countertop can very well resist heat, it is susceptible to thermal shock. This is when there is a sudden change in extreme temperatures.

Simply put, if you expose your quartz countertop to extremely high or cold temperatures, it may experience thermal stress that will in turn, cause cracks, chips, or worse still, damage to the structural integrity of your countertop.

Practical considerations

With the myth about quartz being indestructible out of the way, it is necessary to be cautious with yours. While occasional exposure to hot crockery may not cause much or immediate harm, constantly subjecting your quartz surface to extreme temperatures will be detrimental.

Therefore, you may find it useful to employ responsibility when using your quartz surface to extend its life.

Importance of trivets and hot pads

Although a quartz countertop is durable, practicing proper maintenance is crucial, and the best part is that it’s not taxing.

The most you would have to do is place trivets and hot pads on top of your surface to create a barrier. What this does is that it reduces the chances of thermal shock when the surface comes into direct contact with your hot pans or boiling water.

Effects of boiling water: Immediate vs. long-term

At this point, you already know that pouring hot water on a quartz surface is unlikely to cause damage immediately owing to its heat-resistant properties.

Nonetheless, you must not take this for granted. Rather, you must be careful not to allow your surface to suffer the long-term effects of doing the same.

Extended exposure of your quartz countertop to hot water can compromise the countertop’s resin and lead to structural damage, surface dullness, and discoloration.

Mitigating risks

Like any other homeowner, you may want to reduce the risks that may compromise your quartz countertop’s longevity and visual appeal, right? Here’s how to do that.

1. Avoid direct heat

As previously mentioned, you want to avoid placing hot cookware directly from the stove or oven onto the quartz surface. This is because direct exposure may lead to thermal shock which will compromise the resins in your quartz countertop and ultimately cause structural damage.

2. Clean spills promptly

While it is normal to have spillages in the kitchen or bathroom, you want to avoid damaging your countertop by promptly cleaning them up. This is particularly important if it is a hot liquid spillage. Your quick action is what will minimize the likelihood of your quartz surface getting damaged.

Debunking common quartz countertop myths

There are some common myths regarding quartz countertops. Debunking them will help ensure that you get the most out of yours.

Myth 1: Quartz is indestructible

Yes, quartz is durable and can resist a lot, but that does not mean that it is invincible. In that regard, you want to put in place the right maintenance practices that will guarantee the extended life of your quartz countertop.

Myth 2: Boiling water causes immediate damage

Accidental or purposeful pouring of hot water on your quartz countertop should not cause panic. This is because the material has remarkable heat-resistant abilities.

While this is the case, frequent exposure to hot water or other liquids is detrimental and may ultimately affect the structural integrity of the quartz.

Generally, quartz countertops can withstand temperatures up to 150 degrees Celsius (300 degrees Fahrenheit) without immediate damage.

It is no wonder that they are a popular choice among homeowners for areas like the kitchen where heat is involved.

As you may have guessed, knowing and respecting these temperature limits is what will make the difference between a long-lasting countertop and one that weakens after a short while.

Conclusion

Pouring hot water on your quartz kitchen countertops NC is not something that you should make a habit. If you do, you risk compromising its durability, beauty, and color. Instead, you should think of it as an occasional occurrence that perhaps happens accidentally. Moreover, you should clean up the spillage as soon as it happens.

Ultimately, quartz countertops can handle only up to 150 degrees Celsius of temperature. Anything beyond that is detrimental, especially in the long run.

Tricks to Making the Most of Your Small Kitchen Countertops

Even if cooking isn’t one of your favorite activities, a small kitchen countertop can make life difficult. Even if you’re not slicing veggies, you’ll want a large enough surface to set your grocery bags, appliances, and other accessories or decorative objects, but how do you make the most of a little countertop?

If your modern kitchen doesn’t have enough space for an island, you’ll have to make do with the countertops you have, which is more said than done.

To help you out, here are easy ways to maximize space and make the most of your small kitchen countertops.

Choose multifunctional appliances

Appliances usually occupy a lot of room on your kitchen countertop, so opt for multifunctional ones whenever possible.

If you like coffee, your coffee maker, grinder, and frother (together with all their cords) might take up a lot of space on your worktop.

To save space, consider a coffee maker that grinds the beans, brews the coffee, and froths the milk. Although such an appliance will be of significant in size, it will still take up less room than the individual parts, and you can rest assured that there will be no excess wiring cluttering your space.

Many people often ignore the oven, which isn’t good. Consider replacing an integrated one with the standard four burners in your tiny kitchen with a domino hob.

Because most people don’t use all four burners simultaneously, choosing a domino hob with only two burners mounted vertically can help you gain some extra inches.

Get rid of duplicates and anything else you aren’t using

When you have limited room, you can’t afford to keep every outdated thing you don’t use.

This is because they will create a cluttered appearance and slowly but steadily take up the majority of your available surface, which is why it is critical to declutter your kitchen countertops if you want to regain some space.

Duplicates are common in most kitchens. You can be five-can openers or twenty wooden spoons, which aren’t necessary. To free up space, collect items from the same category and minimize the volume, preserving the best and greatest quality.

This way, you’ll have fewer things (that you use) but have more space.

Make use of the space above the sink.

This is a brilliant solution that you can use to your advantage. You need to cover the sink with marble or any other material and make use of the space.

Since you have covered the area you wouldn’t have used, now you have space to do some cutting and many other tasks.

Organize your cupboards properly.

Many people wind up cluttering their worktops with objects that could easily fit in their kitchen cabinets if they were a little more organized.

You can arrange your space more wisely now that you’ve decluttered and removed all duplicates and objects you don’t need.

Begin by organizing and maximizing your cabinet space so your countertops are not congested. This calls for you to look into storage alternatives for your kitchen cupboards to keep the counters clear.

Fortunately, there are numerous kitchen storage solutions to help you maximize your cabinet space, which allow you to use all of the area while quickly accessing all of your items, spice racks that hang on the back of cabinet doors, and shelf organizers, which allow you to use the space vertically.

You can use wire storage baskets to maximize space within your cabinets so you can tuck in.

Making the most of your storage means you’ll have less need to keep storage caddies or food packets on your countertops, which leaves you enough room to do other things.

Make use of drawers.

Because you’ll be stashing as much as possible away from the counters, you will have a lot of space.

If you have a mix of drawers and shelves, the equipment you use the most should be in the drawers, while less commonly used tools, such as special cake pans, should be stored in the rear reaches of the shelves.

If you don’t have a lot of lower drawers, try installing pull-out cabinet shelves, which are as close to retrofitting drawers into your existing cabinets as you can get.

Think about decanting

It’s debatable, but there is no harm in decanting pantry products into glass jars. After all, when the pantry items are too many, you place them on the countertops, and you don’t want this.

Yes, it’s fussy, but in a compact area, they fit far more neatly into cabinets than a jumble of boxes and bags, resulting in less mess overall and the need to move some to the countertops.

You can upcycle tomato sauce jars and the like, but nothing beats old-school clip-top jars when it comes to airtight storage.

Using the version has much potential for extra storage, but you’ll want to be careful not to crowd your area with too many objects hanging from the walls.

A magnetic knife rack on the wall is practical since it takes up far less space than in-drawer knife storage or a knife block, and it keeps your blades within easy reach.

A hanging rail is also a good idea to consider for that added space.

There are other alternative options for going vertical. For example, you can screw cup hooks into the underside of higher cupboards and hang your cups next to the coffee maker.

Install a hook and hang a wire fruit basket to reclaim the space previously occupied by the fruit bowl, and purchase strong magnetic hooks and stick them to your range.

While going vertical will save you a lot of granite countertops Raleigh that you can use for other roles, you should note that if you use all of these tactics, your kitchen will feel claustrophobic. And you don’t want this.

Instead, you should work with experienced contractors who will guide you on taking advantage of the vertical spaces without letting things get out of control.

Tricks to Keep your Kitchen Countertops in Top Shape

The right kitchen countertop surfaces can be highly advantageous. High-quality countertops add value to your life and help you attract serious buyers if you ever decide to sell.

They also significantly improve the functionality of your kitchen.

Unfortunately, you can’t get these benefits when your surfaces are in horrible shape. How do you keep your kitchen countertops in tip-top condition? Here is how to go about it:

Professionally install the countertops.

Finding an experienced professional to ensure a quality installation is one of the simplest ways to ensure your kitchen countertops remain in good condition.

Keep in mind that some kitchen countertop materials necessitate a lot of upkeep. This means that maintaining your countertops will be more difficult if you’re not up to the task.

As a result, it’s advisable to start by consulting an expert to determine which kitchen countertop material is appropriate for your needs.

You should also take the time to find a kitchen renovation professional who has experience installing new worktops. Begin by asking anyone you know who has recently installed high-quality countertops you admire for a referral.

You can also look online and read reviews to find a professional to install the countertops properly.

If you’re tempted to do it yourself to save some money, don’t since there’s a steep learning curve. You don’t want to be learning on the job and ruining your expensive counters. 

When poorly done, your kitchen countertops can become skewed and have ill-fitting, improperly sealed joints, and you don’t want this, do you?

Improper installation leads to uneven surfaces, discoloration, and peeling that you don’t want on your surfaces.

If you don’t want this, you should take your time and find an experienced professional who will expertly install the countertops and advise you on the right ones to go for and take good care of them.

Clean the countertops properly.

If you apply the proper cleaning methods, your countertops will remain in excellent shape for a long time.

One of the habits you should take up is to clean the spills as soon as they happen. When you do this, you ensure that you don’t have stains on the surfaces, as you don’t let the spills stay on the surfaces for too long.

Of major importance is keeping an eye out for acidic substances, which can harm most kitchen countertops. If any acids spill on the counters, remove them immediately.

You also should make it a habit to clean your surfaces as regularly as possible. When cleaning, avoid using abrasive products as they have been shown to cause excessive damage to the characters.

As a rule of thumb, don’t use steel wool, as it’s prone to scratching the countertops, giving them an ugly appearance.

The best way to clean your surfaces is using a basic cleaning solution and a microfiber cloth. Using a microfiber cloth, in particular, can do wonders because it is incredibly absorbent and effective at removing grime.

Seal your countertops

If using synthetic countertops, you won’t need to apply a surface sealant. Unfortunately, this is a must for granite, wood, or concrete counters because the surfaces are porous, and the sealant protects against scratches, stains, and drying.

If you don’t correctly seal your porous countertops, moisture can accumulate and cause various issues, including the spread of bacteria.

This can harm the function of your countertops since if you can’t adequately clean them, they may be unsafe to use for food preparation.

Sealing the surfaces also prevents etching, which occurs when you spill liquids such as lemon juice and don’t wipe them up soon enough.

Properly sealed countertops are also easier to clean, and the sealer aids in preserving the countertops in their natural condition. 

The best time to seal the countertops is during the installation. Hiring a professional for installation is a smart option because they will know what sealant to use.

When sealing, use a high-quality sealant that will last for a long time. As much as it’s important to seal your countertops at the time of installation, you should note that this isn’t enough—countertops require regular resealing to remain in good condition.

In most cases, you will still need to reseal the surfaces at least once yearly.

Even when resealing, ensure you use a high-quality sealer for a great experience.

Keep heat away from the surfaces.

Keeping heat away from your countertops makes sense because heat is harmful and warps materials.

When materials are heated, they expand and then contract. The same thing happens to your countertops. When you expose them to heat, they get damaged by this frequent expansion and contraction.

To stay safe, ensure your cooker is not in direct contact with your counters.

You also should make it a habit to place a mat on the surfaces whenever you get something from the oven. Having a trivet in place also doesn’t hurt, as it protects your surfaces from getting damaged by a hot plate.

Pay attention to the manufacturer’s instructions.

Because countertops are built from various materials, they may have varied care and maintenance requirements. In that case, you should first contact the manufacturer of the countertops in your kitchen to see if they have any care instructions.

Even if you can’t find these instructions, you can always ask a contractor or an expert about the best approach to maintain your specific countertop brand.

Contractors with extensive expertise in installing worktops are more likely to be familiar with their care and upkeep. So, when installing, ensure that granite installers Durham or any other experienced experts handle it.

The cleaning instructions change based on the material. When cleaning laminate, for example, it’s preferable to use warm, soapy water and a textured fiber sponge.

Because granite countertops require pH-balanced cleaners, avoid natural cleaners like lemon juice, vinegar, and citrus, as they are slightly acidic.

The same is true for marble surfaces, which can be quickly harmed if you use acidic or low-pH cleaners.

To stay safe and ensure that your countertops last as long as possible, adhere to the manufacturer’s guidelines as strictly as possible.

Can You Install Granite Countertops by Yourself?

Ideally, you should hire granite contractors to install the countertops for you. If you don’t have the money to hire a professional, don’t worry, as with precision and hard work, you can install the countertops by yourself. 

To help you out, here is how to go about the installation:  

Have the necessary tools

Before you choose a granite slab from your preferred home furnishing store, make a list of the installation tools you need for the project and put them in place.

The ones you need include a putty knife, caulking gun, circular saw, measuring tape, jig saw, level, granite dye, masking tape, seam stone, filler, and dry-cut segmented diamond blade.

You use the jig saw to cut out the sink hole (though you may need to hire a professional for this step), use the masking tape to protect the seam lines, the putty knife to mix the seam filler with a dye, and the diamond blade to cut and seam the slab.

You will need a 0.75-inch plywood to brace the top of the cabinet upon which you will install the slab.

Be ultra-cautious when taking the measurements.

Installing a granite slab without determining how much countertop space your kitchen requires is a recipe for disaster.

So, if your granite slab manufacturer refuses to send a specialist to your home to take measurements until you pay an additional fee, you go ahead and take the measurements by yourself. When taking the measurements, be cautious to ensure a flawless job.

For the best outcome, measure the length and width of the top of the counter, which should be done in inches. You should multiply the measured length by 25.5 inches to get the overhang.

The overhang is the legroom required to sit comfortably around the countertop while allowing movement around the kitchen. After multiplying the length of the counter’s top by 25.5 inches, divide the result by 144 to get square footage.

The amount of granite you need for the backsplash should be included in the calculation. This should, of course, be the same length and thickness as the countertop slab, but the height is different.

The backsplash height is typically 4 inches. To convert it to square footage, multiply 4 inches by 144.

Properly prepare the installation area.

Besides having the necessary installation tools, there are several other ways you need to be ready for the installation.

Start by removing the old countertop and plumbing fixtures, level the counter surface, and clear the space around the counter.

Clear the area surrounding the cabinet and remove the old countertop using a nail puller or a screwdriver, depending on how you fastened it. This should expose the counter’s surface for leveling. The purpose of leveling the exposed counter is to maintain stability and facilitate the installation of the new granite slab.

Use plywood and shims for leveling because this is the combination most typically utilized by specialists to obtain professional-level results.

After leveling, turn off the plumbing and uninstall it to avoid an installation disaster. Remember to remove the existing backsplash as well.

Cut the countertop slab with precision.

You can waste a lot of money if you don’t cut the stone as well as it should. To save money, cut a granite slab to fit and look nice after installation.

To ensure that this happens, cut the stone with extreme caution. You will even be better off if you can hire a professional to do it for you.

When doing it, protect yourself from dust by wearing goggles, earplugs, gloves, and respirators. Move all kitchen objects to a location where dust will not settle.

With that out of the way, use a ruler and a marker to create the arrangement of your countertop design. Using a pair of scissors, carefully cut out this layout and pattern.

Following in the footsteps of the Marble specialists, clamp the acquired granite slab with C-clamps and cut it into the pattern in the cardboard using a saw.

Attach the cardboard layout to the granite slab and carefully retrace the design onto the slab to achieve this perfectly.

Sharpen your saw blade and begin cutting the slab along the pattern. You’ll experience heat and pressure growing as you cut.

Control this by having someone on standby to spray water on the granite as you slice it. Also, keep your eyes on the saw while you cut to avoid injury, and remember to take breaks at regular intervals to evaluate your progress.

After cutting, use an angular grinder to smooth the slab’s edges.

Properly seal the seams.

Improperly sealing the joints of your granite countertops means that you will have to deal with cleaning issues, and you don’t want this, do you?

To have an easy time, ensure you get the proper amount and color of professional-grade sealer. If you’re going to build a sealer out of a polyester-based resin, coloring, and hardener, selecting the pigment mix that will make a blend that properly matches the color combination of your granite slab can be difficult.

In this instance, you may require the assistance of a skilled color-matcher.

You should mix the dye with the resin after obtaining your sealer materials until the color matches that of your granite slab and the combination forms putty.

You can experiment with different colors and resin in little amounts until you find the perfect color combination. After that, add your hardener to the putty resin-coloring mixture and thoroughly swirl.

Finally, apply your homemade sealer to the seams and let it harden for up to 24 hours.

Parting shot

These are some of the things you need to do to install granite countertops in your home correctly. As mentioned, you can do the installation yourself, but for the best outcome, let the work be handled by experienced granite countertop installers NC who know what they are doing.  

Tricks to Get the Most Value from Your Kitchen Renovation

With images of stunning kitchens filling Instagram and Pinterest by the hour, it’s easy to fantasize about a high-end renovation. 

As much as you want a beautiful kitchen, a pricey remodel with cutting-edge appliances and luxurious finishes would not always increase resale value in the long run.

The best return on investment will be a minor remodel. This could include repainting cabinets, updating the backsplash, and upgrading the appliances. 

Would you like to get the most from your kitchen renovation? Here’s how to go about it:

Go with marble countertops.

Homeowners’ desire for the opulent beauty of creamy Calacatta or Carrara marble isn’t going away anytime soon. 

To give your kitchen an elegant appeal, install marble countertops. The countertops are great, but they require more upkeep and come at a higher cost.

Still, considering investing in natural stone? Include Dry-Treat’s Stain-Proof, a unique sealant that prevents discoloration for up to 15 years.

If you don’t want marble or can’t afford it, there are other less expensive options you can go for. For example, you can go for engineered stone, such as quartz, which resembles marble and is stain-resistant and antimicrobial. 

If you’re looking for a quick bang for your buck and want the look of marble, you can get a realistic-looking porcelain slab at a fraction of the price.

Add an island

While adding an island is a significant undertaking, it is worthwhile if you want to stay in your home for a long time because this hardworking feature offers functionality and has long been on many buyers’ wish lists. 

When someone walks into a kitchen with an island, they immediately notice more countertop prep space, storage, and seating.

While you should consider installing a kitchen island, it doesn’t imply you should pack one into a cramped quarter. You should only consider installing an island if you have at least 36 inches of clearance on all sides. It will even be better if you have 42 to 48 inches.

Go with simple neutral cabinets.

Cabinets typically consume around 30% of a restoration budget and should last 20 to 25 years. As a result, you should be strategic how you go about it. It’s best to adhere to classic styles like Shaker and widely appealing colors.

Your warmer neutral colors are more pleasing and safe. While white kitchens are popular, consider installing soft taupes, dark blues, linens, and grays.

Install the right cabinet grade.

Cabinets are classified into four quality levels: bespoke, semi-custom, stock, and ready-to-assemble. With custom or semi-custom cabinets, cabinet sizes can vary, and numerous finish options exist.

Custom cabinets are great, but you shouldn’t go for them. This is because they aren’t appealing to many who might be looking to buy your unit. 

Instead of custom cabinets, use inexpensive options with adjustable modifications for renovators on a tighter budget.

You could save a lot by going for a simple kitchen, but it depends on the bells and whistles you choose.

You can deck out your kitchen with semi-handmade doors and find yourself cost-wise in the semi-custom category, or you could do semi-custom cabinetry without as many bells and whistles and find it relatively inexpensive.

If replacing the cabinetry isn’t within budget, install a fresh coat of paint, which is a faster and less expensive solution.

Go with subway tiles.

This classic option remains your best bet due to its broad appeal, versatility, and affordability. You can install the tiles in a herringbone or brick pattern or straight stack for a more modern look, which lets you customize a space without a ton of cost.

While this is the case, remember that the more detailed the pattern, the more money you’ll spend on labor, so you may want to reconsider that beautiful chevron design.

When hiring contractors, take your time and hire the best in the industry. Don’t hire the cheapest, as they will most likely become too expensive in the long run as they will fail to install the tiles properly, and you have to reinstall them, which will be an additional expense.

Install layered lighting

Plan for general and task lighting so you can see when you’re cutting celery. As an easy improvement, install under-cabinet lighting and select statement-making lighting over the island.

When done well, the light fixtures can add that pop of personality, and you can easily change them when you opt to sell the house.

When choosing the fixtures, go with those that complement the space’s decor and purpose. Depending on their form and placement, pendant lights, chandeliers, wall sconces, and track lighting can all serve as ambient or accent lighting.

For the best results, always consult experienced contractors on the best ones.

Replace the hardware

Changing the hardware is another simple technique to refresh worn-out cabinetry. Though cabinet knobs and handles vary in price, you don’t have to spend a lot to make a big difference – there are many possibilities for less you can go for.

Plus, you don’t have to worry about being too trendy because it’s so simple to replace if it goes out of style.

Again, work with experienced contractors who guide you and help you make the right choices.

Coordinate appliances

Try to match appliance finishes, such as going entirely stainless steel or selecting panel-ready models. All new appliances can cost between 10% and 20% of the total renovation expense.

As much as you should try to match the appliances, be cautious and don’t go overboard: If you remodel a kitchen with state-of-the-art appliances but a future buyer doesn’t cook, they won’t be willing to pay.

Be conservative and majorly focus on functionality.

You will benefit more by fixing the appliances instead of installing new ones. For example, instead of undertaking countertop replacement NC, repair the ones available.