Tag Archives: granite company

How To Polish Marble Countertops

Do you have dull marble countertops and don’t like their unappealing look? Don’t worry as you can easily restore gleam. How do you do it? Here are steps on how to polish marble:

Step 1: Clean the countertops

Cleaning the countertops ensures you start with a clean slate. Use a soft, dry cloth to remove any surface dirt and debris, then wet a non-abrasive sponge with warm water and use it to wipe the marble top again.

Spray the marble surface with a commercial stone cleaner and wipe it off with a clean, soft rag or a mild dishwashing liquid. Once you are done, rinse it well with plain water.

If you used a commercial cleaner, use a clean damp rag to wipe the marble cleaner. You should then dry with a chamois or an unused microfiber cloth.

Step 2: Remove stains

Since marble is porous, it tends to easily develop stains, especially if you don’t take good care of it. Before you proceed with polishing, you need to get rid of these stains. How do you do this?

If you have the budget, buy a commercial marble stain remover. If you don’t have the money or you love making your own things, you can make your own stain remover by mixing one tablespoon of ammonia into a half cup of hydrogen peroxide then slowly add just enough baking soda to make a thick, creamy texture.

You should then spread the poultice over the stained areas using a clean paintbrush and cover it with a plastic wrap. Leave the poultice in place for 12-24 hours, remove the wrap and let it dry out completely.

Using a razor blade, carefully scrape the crumbly poultice while taking care you don’t gouge or dig at the marble surface. You should then clean away any remaining poultice residue with a damp cloth then wipe the marble dry.

Step 3: Buff out the etching with a polishing powder

If your countertops have severe etching, don’t waste your time or money with polishing powder. Instead, hire a professional to look into it. On the other hand, if your countertops have minor etching from acidic foods and cleansers, you can remove them easily using a polishing powder that you can buy from a home improvement store.

After getting the powder, wipe it over the etched areas with a water-dampened cloth, then sprinkle small amounts of the powder onto the etched spots. You should then gently buff the powder into the blemishes with a damp cloth, then follow with a clean, damp rag to the powder residue.

You should finally wipe the countertops dry to reveal the restored shine.

Step 4: Seal the countertops.

After polishing the surfaces, seal the marble countertops to retain the shine and resist major stains. You can use topical or impregnator sealants.

From their name, topical sealants sit on the top of the marble and prevent staining while impregnators go below the surface and repel water and oils while still allowing marble to breathe.

Your countertops will look best when you seal them with an impregnator.

You can do the sealing by yourself or let a professional handle it. If doing the work yourself, begin purchasing the sealant from your local hardware store, then apply it on the surface.

After applying the sealant, give it a few minutes to dry. You should note you shouldn’t let it fully dry as it will streak. After 10-20 minutes, wipe off the sealant residues using a dry cloth.

You should then allow your marble to sit 6-8 hours without placing anything on it.

Retaining the shine

Other than sealing the countertops, you need to take good care of your countertops, so you maintain the shine. How do you do this?

Clean the surfaces with the right products: While you might be up to good when cleaning the surfaces, you might be harming them by using the wrong products. As a rule of thumb, you should never use bleach or cleaning products containing alkaline or any acidic substances as they will degrade the sealer and expose your countertops.

Remove spills as soon as they happen: Even if you have sealed your kitchen countertops Raleigh, it’s stupid to leave the liquid on the surfaces for a long time as it tends to penetrate the porous marble, leaving ugly stains that are difficult to remove.

To ensure this doesn’t happen, make it a habit to clean spills as soon as they happen or as soon as you notice them.
8 Tips On How To Keep Kitchen Countertops Clear

Keeping your kitchen countertops clear of clutter not only keeps them looking good, but it also prevents accidents from coming about. Wondering how to keep kitchen counters clear? Here are tips on how to do it:

Have as little as possible on your countertops

This is the foundation of everything. Instead of having plenty of things on your surfaces, store them in organized cabinets and drawers. Save your countertop space only for the absolutely necessary essentials.

Many homeowners treat their countertops as drop-offs for keys, magazines, dirty dishes, and other items. Don’t do this.

When it comes to appliances, only have the absolutely essential ones. These are the ones that you use every day, such as coffee makers, cookers, toaster, oven, and others. A good rule of thumb is if you haven’t used it for a week, you don’t need it on your counters. Lock it up.

Don’t use the fridge as an art gallery.

Visit many homes, and you will find all things on the refrigerators: photos, notes, lists, magnets, and plenty of other things. You might have the impression that this makes you look cool, but it’s not the case. It actually makes the kitchen look dirty and disorganized.

For a cleaner kitchen, keep it simple. If you have no emotional connection to a photo, don’t need that note or magnet, get rid of it.

Have a catch-all bowl

It’s normal to have papers, knickknacks, and other small items here and there. Since you can’t always put these in storage all the time, you should have a junk bowl on your countertops to catch the items.

At the end of every week, sort through the collection and put the different items in the right place.

If you must have things on your counters, don’t leave them haphazardly there. Place them on trays or stands to avoid the messy hodge-podge look.

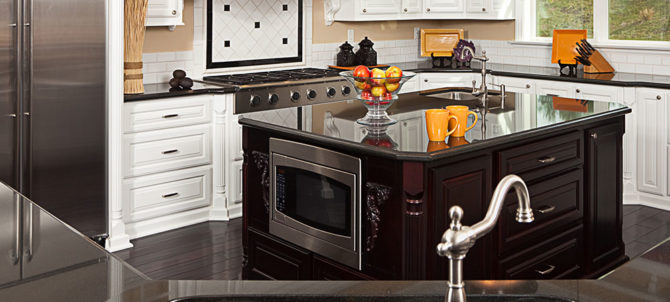
Stick the microwave in your kitchen island

The microwave is large and can take up a huge chunk of the precious counter space. Unfortunately, you can’t put it in the cupboard and be pulling it in and out every time you want to use it.

What is the solution to this? Stick it on the kitchen island.

Make your sink multifunctional.

When buying a new sink, go for one that performs more than one function. For example, you can go for one with mini ledges inside the sink that make it easy to easily pop in the drying rack, cutting board, wash pan and at the same time have space to stack and wash the dirty dishes.

While such a sink will be a little expensive, it will be worth it as it will save you a lot of space.

Add pretty but functional items.

You should note that having clutter-free counters doesn’t mean you can’t have anything on them. You can have your desired items, but they should be attractive and add some functionality to your counters.

For example, you can have jars on the counters that look pretty and carry grains and other materials.

Have decluttering rules

If you have many people living in the same house, have rules that will keep the counters clear. Some of the rules you can have include:

  • Dirty dishes should always go directly in the sink or dishwasher but never on the counter.
  • After cleaning the dishes, always clean the countertop surfaces.
  • Don’t place the paperwork on the kitchen counters.
  • Kitchen cabinets and drawers should always stay organized all the time, so every item in the kitchen has a place.

Add storage areas on your counters.

For items such as knife blocks and others that take up a lot of space, add more storage areas. Some of the storage ideas you can use to your advantage include:

  • Hook for keys
  • Wall hanging fruit basket
  • Wall-mounted paper towel holder.
  • Shelves for cookbooks
  • Wall-mounted racks for commonly used spices.
  • Magnetic strips or backsplash for knives and other utensils

You can also have a pocket inside your cabinet door to store your baking sheet and cutting board. Like your granite countertops Durham, keep the storage areas clean and free from unnecessary junk. You don’t want them messy and disorganized.

What Is The Best Color For Kitchen Countertops?

With countertops coming in all types of colors, it can be confusing to choose the ideal color for your surfaces. What is the best color for kitchen countertops? You wonder. The right color depends on your tastes, how you use the countertops, and the overall style of your home.

We can’t tell you the right color to choose, but we can guide you on the most popular colors, so you make an informed decision.

Pure white

Pure white countertops give your surfaces a minimalist, new look that is inviting to look at. The white color looks excellent in contemporary surfaces and small spaces such as compact condo kitchens paired with minimalist white cabinets. The white color comes in handy at making your surfaces look big.

White is also a great addition for surfaces that already have a great deal of bold character in other finishes such as grainy wood cabinets.

In conclusion, the white surfaces make an excellent choice if you love crisp, modern style, you want to break up modern wood cabinets, or you love a nautical white and blue scheme.

Black

You should be cautious when choosing the black color as it can look gothic in some situations. An ideal application of the countertops is when you have dark cabinetry, dark floors, and other rich and weighty finishes.

If planning to have a dark-on-dark palette, you should have plenty of light sources. They can be natural, added, or both.  This way, you have your space feeling cozy and sophisticated.

The dark color comes in handy when you are looking to bring out the subtle colors in painted cabinets.

When choosing the color, choose dark gray instead of pure black to soften the look.

Countertop experts highly discourage against having one large black element as it will look out of place. Instead, you should have other sprinklings such as black cabinet knobs and pulls.

Black countertops are for you if:

  • You have dark cabinets, and you are looking for counters to blend in with them.
  • You have a smoky mirrored backsplash common in condos and modern homes.
  • You have colorful, fun cabinets, and you want them to shine.
  • You are looking to achieve a classic black and white scheme.
  • You want to connect to other black elements in your kitchen.

Wood

Wood is an excellent material when you are looking to infuse coolness to your kitchen. Wood countertops make excellent material for a transitional kitchen that balance traditional and contemporary elements.

Wood counters are also an excellent addition to spaces featuring wood cabinets. This makes sense if you are a true wood lover and don’t mind wood dominating your palette.

There are plenty of woods you can go with to give your surfaces a unique look. For example, there are lighter woods that have a casual or rustic feel. These woods can be stained or unstained, depending on your preferences.

There are also the darker woods that have a formal or polished look than the other tones. These make excellent additions for bright and breezy areas with plenty of windows.

When mixing wood counters with other wood finishes, you should stick to either warm or cool tones. This is to prevent them from clashing.

Wood countertops are good for you if you want an accent countertop to contrast with your other surfaces, your white cabinets need some warming up, you want your space to feel more approachable and intimate, and you enjoy a dash of rustic charm.

Gray

Gray is a neutral color, so a perfect material when you aren’t looking to make a statement in your kitchen. For a great look, pair the material with colorful cabinets. One of its greatest applications is tying together light and dark cabinets.

Gray also makes an excellent addition when pairing it with warm metallic accents. For example, if you have a brassy faucet or sink, a gray counter works perfectly at bringing out the warm tones, so they shine their best.

According to granite contractors Raleigh, you should choose gray countertops if you want a soft, friendly vibe with muted tones, you have colorful cabinetry or multiple tones of cabinets mixed together, you have warm metallic accents, or you have a black and white scheme that needs some softening.

Tips On How to Break Granite Countertops

Granite is one of the most robust materials you can install in your home. With its unique, attractive colors, the material gives your kitchen an attractive and adorable look. Unfortunately, like other countertop materials, it wears out, gets old, or gets damaged, so you have to replace it.

Removing the countertop requires skills and strength. Are you wondering how to break granite countertops? Here is a guide on how to do it:

Get the necessary equipment.

You need to have the right tools for the job to break granite. The tools you need include: rubber gloves, bucket, air hammer drill, safety goggles, and Dexpan or any other explosive demolition agent.

Mark a line

Using water-soluble chalk, mark a line where you want to break granite. You should then drill holes measuring 1-1/2 to 2 inches wide into the granite slab along the line. For best results, space the holes 12-24 inches apart while ensuring each hole is 80% the total depth of the granite slab.

Mix the demolition agent

Following the package instructions, mix the non-explosive demolition agent with clean water. The best way to do is to mix one part agent with three parts water in a bucket until the powder has completely dissolved into the liquid. To protect yourself, wear rubber gloves and safety goggles.

Clean the holes

You should clean the holes with an air compressor before filling them with the mixture. You should fill the holes 2 inches from the top with the mixture then back away. Allow 45 -60 minutes for the mixture to expand within the hole, causing the granite to break along the line you created.

Avoid pouring the mixture when the temperatures are incredibly high. If possible, pour the mixture in the night and allow granite to break early in the morning or in the evening after the sun has set. If the holes are exposed to direct sunlight, cover them with a tarp until the slab breaks.

Clear the area

After breaking granite, you should now make a move to remove the countertops. Before you begin removing the countertops from your surfaces, remove any countertop accessories and appliances present. You also should empty drawers and products contained in the bottom rack of your drawers to prevent dust contamination and provide uncomplicated access towards the countertops.

Remember also to clear the utensils and cookware region.

Release the area

Identify the connection in the area between the cabinet’s front brace and the bottom of the countertop. You should look inside the head of the cabinet to see it. Using a hammer, hit the edge of the pry bar then screw softly to release any glue.

If you find plywood underneath the granite, work under it to detach or separate it from plywood. You should then tap a wooden shim into the already open joint to hold the countertop in that area. You should operate along the front side, screwing and shimming before you slowly raise the entire front rim.

Raise granite away from the cabinet supports

Using a pry bar, raise granite away from the cabinet supports beginning from the front and over to the back. Remember to insert shims as you proceed. You should proceed lightly to avoid breaking granite. Work along the length of the countertop, prying back only the next few centimeters.

You should continue working in section until you raise the entire countertop from one end to the other.

Tilt the countertop

Working together with a few assistants, slowly tilt the countertop from the back edge and transfer the granite to your place for storage.

You should store the granite with the top facing down. If granite has plywood underneath that needs to be replaced, carefully pry it free. Be gentle and lightly detach the seal and extract the plywood. If there is extra plywood remaining, pull or paint it with a sturdy scraper from the granite base.

Parting shot

Breaking and removing granite kitchen countertops Durham isn’t hard when you have the right removal tools and know what you are doing. If you are a DIY enthusiast, you can save some money by doing the work yourself but for best results and avoid damaging the cabinets in the process, let experts help you out.

Wondering What To Do With Leftover Granite Countertops? Here Are 9 Genius Ways To Give Them A New Life

After installing your countertops, you are left with granite remnants that many homeowners don’t know where to take them. Most homeowners toss the remnants in the dumpsters, which is wrong. Are you wondering what to do with leftover granite countertops? Here are 9 genius ways to give your pieces a new life:

Make a granite cutting board.

If the leftover piece is large enough, why not make a cutting board out of it? Although tough, granite is easy to shape and finish giving you cutting surfaces that match the rest of the kitchen.

If considering making a cutting board, you should note that it will be much heavier than your traditional cutting board. It also might be tough on knives. If creative, you can add a rotating bottom to the cutting board and make a lazy Susan.

Make earthly coasters

The remaining pieces aren’t large enough? No problem as you can make earthly, unique coasters with them. While most of the coasters are squares, it doesn’t have to be the case with you. Make circles, triangles or even irregular shaped coasters that will look cool when stacked on your tabletop.

Design a tabletop

If a relatively large granite slab remains, you can pair it with a good-looking base and convert it into a tabletop. You can use a stump for legs, curve an iron base, or install any other material. Like a glass tabletop, ensure you have bevelled edges for an attractive, safe finish.

You should note a granite slab is heavy so you should be creative in how you place it, so it doesn’t topple over. Ensure the top is 1/3 bigger than the base’s surface area. Remember, the less the tabletop overhangs, the more stable it is. To increase stability, glue or screw 1-inch plywood to the base.

Turn the slab into a shelve

If you have a long slice of leftover granite, you can create a shelve from it and give your kitchen, bathroom, mudroom or any other room a modern look. When installing the shelve, remember granite is heavy so have the work done by an experienced technician

Make a mosaic patio garden

Have many leftover pieces? You can lay them on your garden and use them as a patio. You can use slabs of the same pattern or different patterns. It’s up to you to create the design you want. For a great look, ensure an expert does the work with the right amount of experience.

Make a piece of furniture.

If the pieces are large, you can make an entire table or chair from them. Wouldn’t it be fun to have a lovely round table to sit out on your balcony, patio or kitchen? A table made from leftover pieces is unique, giving your living areas an interesting look.

When it comes to the legs, choose thin metal or cast iron. To complete the look, get matching chairs.

If the remaining piece isn’t large enough, you can make a wooden side table from it. If you are creative, you can do the work by yourself but if you have no experience, let a professional help you out.

Create a serving platter

Whether you are a loner or love entertaining, you can’t go wrong with a serving platter. If you have a moderately sized slab, you can convert it into a serving platter and use it as an accompaniment to cured meats, cheese, fruit, artisan bread and many others.

The cool thing is making the platter is easy—you don’t need to hire an expert. With minimal creative skills, you can get the work done.

Make a house number sign.

Irritated with the constant peeling off of your door numbers from the plastic? You can be the envy of your neighbors with a creative and unique granite number plate. You can engrave or paint the number of the leftover slab.

Like the serving platter, you can do the work by yourself—you don’t need to hire a professional to help you out.

Sell the remnants

Dont have a plan to repurpose the pieces? Approach the local granite contractors Raleigh and find out if they can buy the pieces for their projects. If the remnants are of significant size and good design, you will find contractors that will be happy to take them off your hands and put them into better use.

Is Sealing Granite Countertops Necessary?

granite kitchen countertops

Imagine this. You spend an arm and a leg installing a new granite slab on top of your new cabinets then out of nowhere, your granite contractor starts talking about the need for a granite sealer to seal the countertops. It sounds like a scam. After all, granite is a rock, right? Why would it need to be sealed? Is sealing granite countertops necessary?

The short answer to this question is NO, you don’t have to seal the countertops. I know you have read that granite is porous, so you need to seal it to prevent stains from coming about, but this is not the case. Before you begin throwing stones at me,

Let me explain the deal.

While new granite slabs need a seal to prevent them from staining, it doesn’t mean you should blindly apply the sealer on any new slab you come across. You should note that most granite slabs don’t need sealing.

The dark coloured slabs don’t need the application of the granite sealer as they are already too dense to absorb liquids and stain. Aren’t sure whether you should seal your slabs? To determine whether your countertops need sealing, you should do a test.

Test to determine whether you need to seal the countertops

The cool thing is you don’t need to call the CSI or spend a fortune to tell whether your countertops are ripe for sealing. You can easily do it on your own at the comfort of your home. Here is how to do it:

  1. Begin with filling a cup with clear, cool tap water. You don’t need a lot of it—a quarter of a cup is enough.
  2. Set a timer on your watch or phone and time the absorption rate of the countertop
  3. Pour a small amount of water onto the countertop. You should pour just enough to create a pool, the size of the hand. For best results, pour it in two or three places across the counter.
  4. After pouring, start the timer or make a note of the time you poured the water.
  5. You should wait for 30 minutes or until there is no standing water on the countertop.

If the countertop absorbs the water immediately, the stone is highly porous, and you need to apply the sealant at least once every 3 months.

If the slab absorbs the water in 4-5 minutes, you should apply the countertop sealant at least once a year for maximum protection.

Does the countertop absorb the water after 10 minutes? Then the slab isn’t too porous, and you can get away with sealing it once every 2 years.

If the slab doesn’t absorb the water after 30 minutes, you don’t need to seal the surfaces to prevent them from staining. You can still seal the slab, if you want to, to avoid scratching and etching.

How to seal granite countertops

If you have undertaken the test and determined you have to seal the slab, you should go ahead and do it. The beauty is that it’s easy to seal the surfaces as you only need to spray the sealer and let it sit on the countertop and then find out if you need to apply a second layer.

If you used a high-quality sealer, you won’t need a second layer so you should always go for the high-quality product.

When buying the sealant, look for one with an advanced chemical technology that will make it possible to form a more permanent bond on the granite slab.

While the high-quality product will cost you more to purchase, it will save you a lot of money in the long run as it will last for a long time.

Sometimes sealing the countertops is messy and you might not know whether you should apply a second layer. To avoid applying less or too much sealing product, you should let a professional do the work.

Countertop care and precautions

Hiring granite companies NC to seal the countertops isn’t enough—you still need to observe the right habits to ensure your countertops are always in tip-top shape. Never place hot items directly on the countertops as you will damage them. To protect the surfaces, use coasters, trivets, mats and other protective items.

Can Granite Countertops Be Repaired?

best kitchen countertop contractor

Imagine this. You spend a fortune on the best granite in your area, hire the most reputable countertop contractors, then one day you notice a crack on your countertops. Frustrating, right? You can’t imagine pouring money on new countertops, so you ask, can granite countertops be repaired?

Yes, you can repair the countertops. Here are some of the ways of doing it:

Etch marks

Etch marks happen due to various reasons, but the most popular ones are due to the use of harsh cleaning materials or cutting lemons or tomatoes directly on the surfaces.

To fix etch marks, begin with cleaning the affected areas using water or stone soap, to wipe away dirt and scum. You should then dry the area thoroughly then apply granite polishing powder. You should follow up by buffering it with an electric drill. For best results, keep the granite powder on the stone as you buff it. Once you are done, clean it off.

Separated cracks

Separated cracks are large, and you can easily see them. You should fix the cracks as soon as possible to prevent them from getting worse. One of the best ways of fixing the issue is by filling in the gaps with an epoxy glue that matches the color of the stone.

If you can’t find the exact color of your countertops, use the dust from the broken area. It’s recommended you hire a professional to help you fix it, but if you don’t have the budget for it, do it yourself. When doing it, ensure that you thoroughly clean the area before applying the glue.

Many homeowners make the mistakes of applying glue to the surrounding areas, which gives the surfaces an ugly look. To avoid this, put masking tape around the area you are trying to repair.

After gluing the separated cracks, re-polish the surface, so it matches the rest of the counter.

Hairline cracks

These happen naturally in granite, and when you notice them, you have no reason to raise the alarm. The cracks are tiny, and most people can’t even tell they are there. The cracks don’t affect the look of the counters, their cleaning, and use. If you have the cracks on your countertops, don’t do anything. Just let them be.

Tips to prevent countertop damage

While the countertops can be repaired, isn’t it wise to prevent the problems from coming about other than fixing them? Thankfully, there are plenty of ways you can do it. Some of these ways include:

Invest in high-quality countertops

Good quality granite slab counters don’t come cheap, so in the bid of saving money, homeowners look for cheap pieces that they can come across. While it’s possible to find cheap, decent granite slabs, in most cases, the cheap slabs are poor quality; hence they get damaged easily.

Others go faux granite countertops. While these might be durable, they don’t give you the same toughness you find in natural granite.

To reduce the chances of your countertops cracking or suffering from any other form of damage, you should only buy high-quality slabs. You find these in reputable natural stone stores. When making the purchase, avoid large stores as they not only sell the stones at high prices, they also lack variety.

Have the countertops professionally installed

Buying high-quality slabs isn’t enough—you also need to ensure the slabs are professionally installed. Poorly installed countertops are not only unpleasing to look at, they also tend to get easily damaged.

How can you ensure your countertops are professionally installed? Simple. Hire an experienced professional.

Its wise you hire the countertop contractor from the same company you buy the granite slabs. This is because professionals working there are usually experienced enough, and they give nothing but top-notch services.

Seal the countertops

One of the flaws with granite is it’s porous, so you have to seal it to prevent stains from coming about. When you don’t seal it according to the manufacturer’s instructions, bacteria will get into the stone, putting your life at risk, especially if you like preparing your food directly on the surfaces.

Failing to seal the surfaces also means water will get into the stone and weaken it.

To avoid this, ask granite contractors Durham to seal the countertops at the time of installation. You also should make it a habit to seal the surfaces one a year.

6 Questions To Ask Granite Countertop Installers

Granite countertops installation isn’t cheap, so you want to ensure the project is handled by the right granite countertop installers. The best way to ascertain you are working with the right professional is to ask the right questions. Some of the questions to ask include:

What professional credentials do you have?

You want to work with a professional that is a member of a professional body. The reason for this is because most companies that put effort into being members of professionals bodies strive to provide their clients with the best services.

The companies are also often knowledgeable on the latest and best practices, so you can be sure they will install your countertops as per the latest technology.

During the interview, ensure the contractor doesn’t merely pay their dues as a member of the organization but rarely participates in the organization activities. You want a professional who is active in the relevant organization activities.

How long will you take to complete the project?

While the duration of the project will depend on the expansiveness of the project, you should be wary of a company that projects the installation to last a few days as it might not provide you with good services.

At the same time, you should be cautious of a company that says it will complete the project in months. Such a company might not be having other engagements, and there must be a reason for this.

In a strong economy, good contractors are booked out 6-8 weeks, so when you come across a company that simply isn’t in a hurry to complete the project, it might be providing poor services hence the lack of clients.

Take time to find a company that is busy and gives you a realistic completion date. The contractors shouldn’t complete the project too fast, and at the same time, they shouldn’t be too slow.

Does your company offer a warranty?

As mentioned, installing kitchen countertops isn’t a cheap project, so you want to be sure your materials won’t get damaged, or when they are, you will be compensated. For peace of mind, you should work with a contractor offering a warranty.

Are you using modern equipment?

You might have the impression the type of equipment the contractors use in their work is none of your business, but this isn’t the case. When a company uses old, worn-out tools, it not only spends a lot of time on your project but also increases the risk of damaging your countertop materials.

You want to work with a reputable company using modern, properly maintained equipment. As a homeowner, you might not be conversant with the right equipment the contractors should use, but you can do your research.

You can also ask other contractors about the best equipment to use, and when you are interviewing, ask whether the company is using them.

You want to work with contractors using the latest countertop installation equipment. This way, they will not only properly and quickly install the countertops, but they also will install them with little risk of damage.

Do you sell countertop materials?

Most installation companies also sell countertop materials, and these are the best companies to work with. This is because you won’t have to deal with many companies to complete your project.

You also stand a better chance of cracking a good deal with the company as you will not only be hiring their services but also buying their products.

If the company is selling the slabs, ensure that it has a wide selection of countertop materials. It should have quartz, soapstone, marble, granite, and many others.

If the contractor doesn’t sell the stones, they should be willing to accompany you to the relevant countertop stores and help you choose the right material for your project.

What is your during-and-post job clean up protocol?

Some companies have the impression that it’s the work of the homeowner to keep their homes clean, but this shouldn’t be the case. Good granite contractors Raleigh shouldn’t leave a mess or create undue obstructions.

Before the work begins, the contractor should cover the furniture and other belongings with a tarp to protect them from dust and other forms of damage. For multiple-day jobs, the contractor should store the tools out of the way and secure the property.

After completing the installation, the contractor should clear away the debris and dust, leaving the property spotless.

What To And What Not To Put On Your Kitchen Countertops

kitchen countertops

Did you know not everything is ideal to be placed on your kitchen countertops? In this article, we are going to look at the things you can place on the countertops and those you can’t. Read on to know more:

What to place on the counters

Some of the things you can place on the counters:

Coffee maker: If you make coffee every day, there is no better place to place your coffee maker than on your kitchen counter. To give your counters a great look, set up a coffee zone. This calls for you to gather everything you use to make coffee with and store it above and below the counter where your coffee maker sits.

Some of the things you should include with the coffee maker include mugs, coffee filters, coffee, and to-go cups.

Mixer: Only a few drawers and cabinets can store large appliances such as a mixer, and the large size and weight of the appliance will damage the cabinets. One of the best places to put the mixer is on the counter.

Tools: You should keep the crock right next to the stove together with spoons, tongs, ladles, spatulas, and other kitchen equipment. Having these items at your disposal makes it easy to reach them when the need arises.

Canisters: Large or small canisters are pieces you store on the counters for decoration or to contain small items. You use them to contain grab and go snacks, napkins, and other small odds and ends that will keep the counters from getting cluttered.

Dish rack: A dish rack is a must-have whether you have a dishwasher or not.

Salt and pepper shaker: Since you are going to be using these all the time, it makes sense to have them on the counters all the time.

Fruit basket: You are rarely going to refrigerate most of the fruits and vegetables—you are most likely going to eat them. To have an easy time reaching out to them, isn’t it wise to have a fruit basket on the counters?

Cutting board: Who doesn’t love large cutting boards on their counters? Unfortunately, most of us don’t have enough space for them, but if you love chopping, you should highly consider having them on your counters. This way you don’t cut directly on the counters and end up damaging them.

What not to place on the counters

Just as there are some items you can comfortably place on the counters, there are some you can’t. They include:

Papers: Papers on the counters gives them a cheap look, and you don’t want this, do you? If you aren’t using them, you should store them in a message center contraption. Preferably on the wall above the counter.

Appliances you rarely use: Are there appliances you rarely use? If you got them and you don’t use them every day, they are better off placed away from the counters as they will not only be giving your counters a cheap, dirty look, but they also will be putting a lot of unnecessary stress on the counters.

Collections: It’s normal to be attached to valuables. Whether its teacups, photographs, or figurines, it’s tempting to display them on the counters, but don’t do this. Instead of having them there, mount them on the wall.

Serving pieces: Only have these on your counters if you entertain daily. If you don’t, they will be taking a lot of space on the surfaces, and you are better off with them in the cabinet. You can also mount them on the wall as décor.

Other ways of taking care of your kitchen countertops

Other than being cautious of the items you place on the counters, there are plenty of other things you can do to prevent your countertops from getting damaged. Some of these things include:

Clean the countertops regularly: You must keep your countertops clean all the time. How do you do this? By cleaning them regularly. This way, you get rid of harmful materials on the surfaces. While cleaning the surfaces is vital, avoid using harsh materials as they will etch the surfaces and cause serious damage.

Cutting directly on the counters:  One of the things you should have on the counters is a cutting board, and you should always use it when cutting meat and other materials. Whether you have marble or granite countertops Durham, always use a cutting board to protect them from damage.

Do Granite Countertops Stain?

granite kitchen countertops

Granite is one of the toughest countertop materials in the market, but it’s not impervious to damage. So if you are asking, do granite countertops stain? Yes, they do stain. While the countertop is tough, it’s porous, and liquids can penetrate the surfaces and cause stains.

Types of stains

The countertops can be affected by different types of stains that include:

Water stains: Water stains are temporary and when they happen, they darken or lighten the countertop material. The good thing is when water evaporates, the color of the stone returns to normal.

Organic stains: These are brought about by organic materials such as mustard, soda, tea, and others.

Inorganic stains: They result from dyes, dirt, ink, and others.

Oil stains: Butter, cooking oil, and mineral oils will damage the countertops when they land on them.

Biological stains: Popular biological stains include: mold and mildew.

Metal stains: Metal stains include rust, copper and many others.

What should you do when your countertops stain?

To retain the elegant look of the countertops, you should remove the stains as soon as they happen. How you remove the stains depends on the nature of the stain. To remove the stains, follow these steps:

Begin with creating a thick paste of hydrogen peroxide and talc powder. For ideal results, ensure the paste has a consistency of putty.

You should then apply the mix to the stained area while taking care not to apply it on the unstained areas. Experts recommend you keep the layer of paste one-fourth of an inch thick and should overlap the stain by about half an inch.

After applying the paste, cover the area with a plastic wrap and tape the edges. Let the paste sit for 24 hours after which you should remove it only leaving the poultice in place. Let the poultice stay on the stain until it completely dries up.

You should then use a plastic scraper and scrape away all the paste. If any paste remains, wipe it with a clean cloth. Follow up with cleaning the countertops normally and dry it with a clean cloth.

In most cases, this will remove the stain, but if it doesn’t, repeat the process and the stain will go away.

Can you prevent stains from coming about?

Yes, you can do it by taking good care of the countertops.  When you are in the kitchen, take care not to spill products on the countertops. Even when spills happen, hurry and clean them up.

To prevent water spills, seal the countertops. For ideal results, follow the right sealing procedure:

Begin with cleaning the counters with water and allow them to dry out completely.

You should then shake the sealer and apply it liberally to every part of the countertop using paper towels, paint roller, or paintbrush. When applying the sealer, ensure you have a thin film on the entire surface of the stone.

After applying the sealer, let it soak into the counters for at least 15 minutes after which you should wipe it off with a clean cloth.

If your countertops are white or have another color susceptible to staining, apply a second sealer coat. Upon applying the first coat, wait for at least 48 hours then apply the second coat.

Once done, wipe the counters with clean towels and paper towels, making sure you wipe away excess sealer. Before you start using the countertops, leave them for at least 24 hours.

Other ways to protect granite

Other than sealing the countertops, there are plenty of different ways you can protect them from stains and other forms of damage. Some of these ways include:

Protect them from UV rays: Most granites are combined with resins susceptible to UV-ray damage that leads to fading and dulling of color. In addition to keeping curtains closed when it’s sunny, talk to your granite contractors Durham and understand the best product to provide maximum protection.

Use pH-neutral cleaners: Granite is sensitive to acidic and alkaline-based cleaners so only use pH-neutral cleaners.  Using the wrong products not only stains the surfaces, but it also etches them, so you have to replace them, which is expensive.